
Connect your calendars
HopStop builds your day from the calendars you already keep. Connect Google Calendar, Apple Calendar, or both, then choose which calendars belong on the map.
- 1
Choose where your events live
On the first screen, tap Connect a Google Calendar and sign in with Google. If your day lives in Apple Calendar, tap Continue with Apple Calendar and allow calendar access. Either one is enough to start.
- 2
Tick the calendars to map
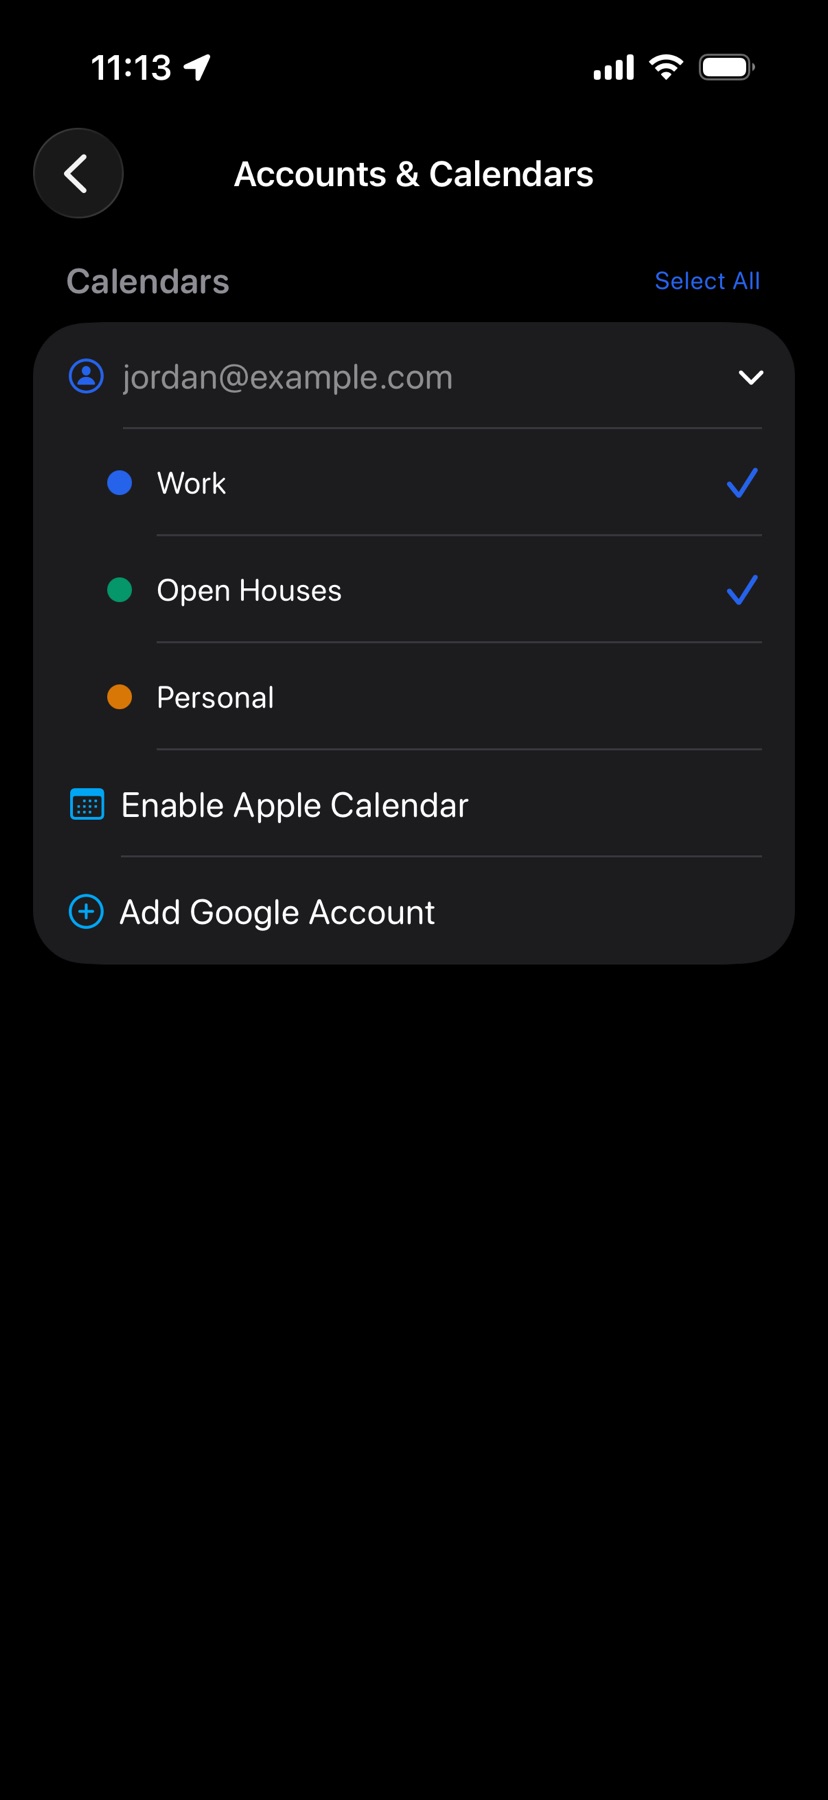
If you have more than one calendar, Accounts & Calendars opens after the welcome slides. Tap each calendar you want on the map, or tap Select All, then go back to the map. Your choice saves as you leave.
Not sure yet? Tap Skip for now and HopStop uses your primary calendar.
HopStop maps events that have an address. All-day events from Apple Calendar don't appear.
- 3
Add another account
Tap the gear icon at the top right of the map, then Accounts & Calendars. Tap Add Google Account to sign in to Google, or Enable Apple Calendar to bring in your Apple calendars.
Your first Google account is free, and you can add a second. Available with Pro.Pro
Change it any time
Open Settings → Accounts & Calendars to tick or untick calendars. To remove a Google account, swipe left on it and tap Remove. If an account shows Reconnect, sign in to it again.
Shown in HopStop 1.0.69 or later.