
Use the map and event list
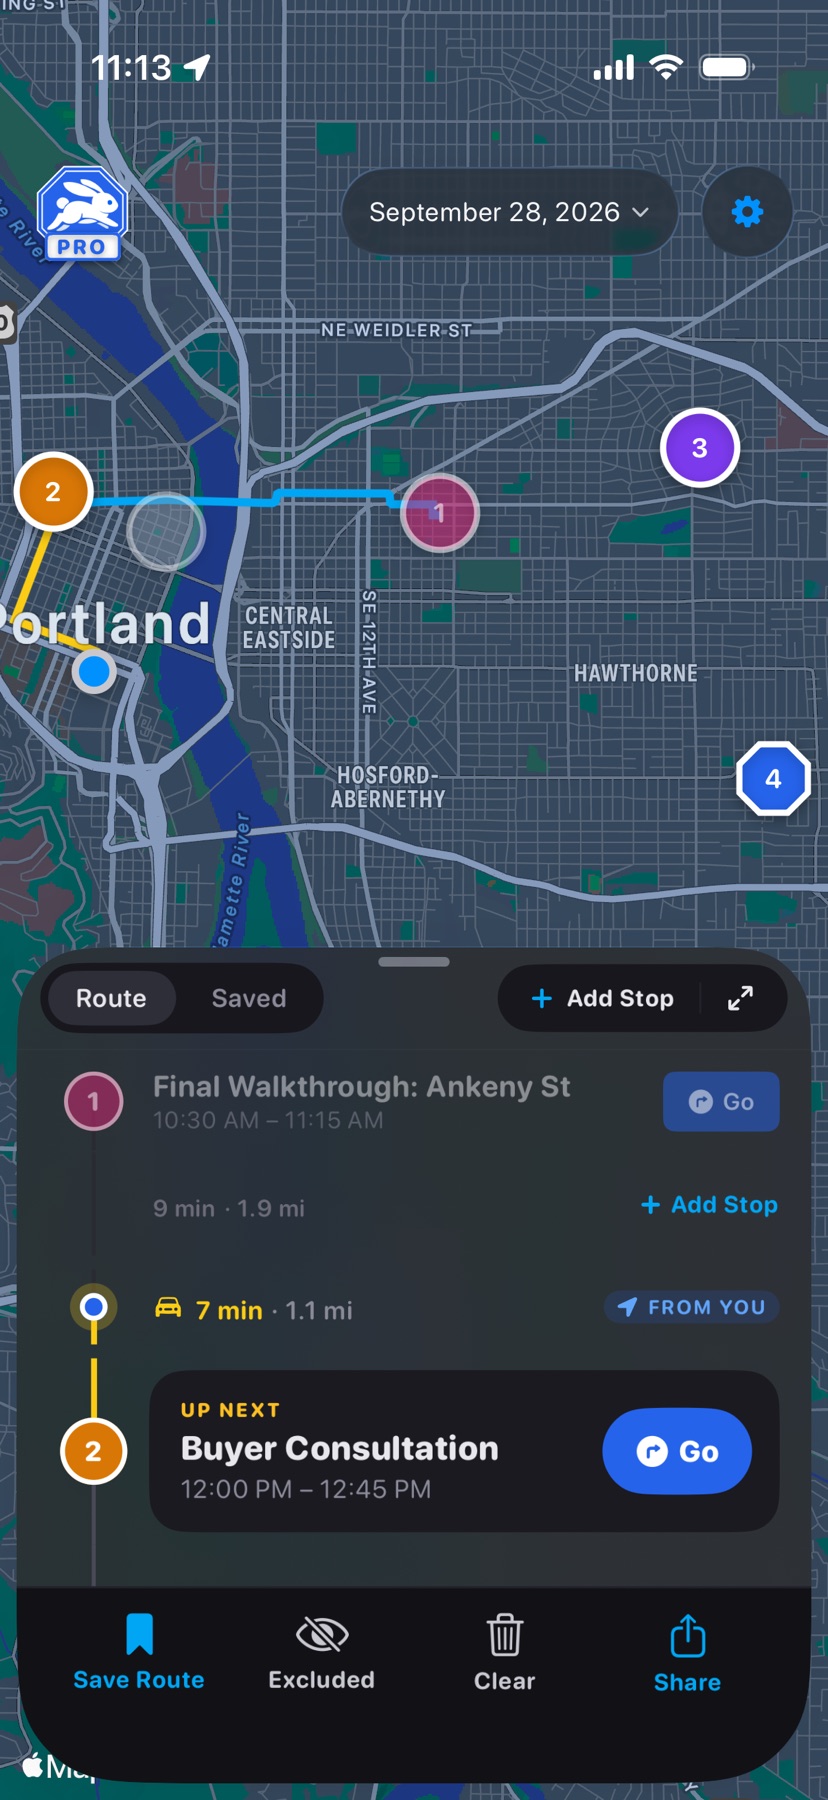
Your appointments are already on the map when you open HopStop. Each numbered pin is an appointment with an address, in route order. The card at the bottom shows your next stop. Swipe it left or right to step through the stops that have an address, with earlier ones faded, or tap a pin to jump to that stop. The map centers on each one, zooming in from the full-day view; tap the HopStop logo to come back to your next stop. When there is another stop to swipe to, the edge of its card shows beside this one.
- 1
Open the list
Tap the card or drag the sheet up to half height. Between each pair of stops you see the drive time and miles, and the next stop carries an Up Next badge. Tap a stop to see its address, notes, and Navigate.
A stop with an amber Address button has no location yet. Tap it to add one, as in Change a scheduled event.
- 2
Edit or leave out a stop
Swipe left on a stop and tap Exclude. It greys out, its pin fades, and drive times recalculate without it. Swipe left again and tap Include to bring it back.
Swipe right on a stop and tap Edit to change its address, time, or title for this day only, as in Change a scheduled event.
- 3
Change the order
Press and hold a stop, then drag it to its new place. The numbers and drive times follow. To go back to calendar order, tap Reset Order at the bottom of the sheet, then Revert.
Head out
Tap Go on the next stop. Directions open in Google Maps, or in Apple Maps if you chose it under Settings → Map & Route → Open with.
Showings, listings, open houses, walkthroughs, and consultations each have their own pin color, and other appointments take their calendar's color. To use calendar colors for everything, turn off Color events by type in Settings.
Shown in HopStop 1.0.69 or later.