
Log miles for taxes
Each day you drive already has a route in HopStop. Log it and you keep a record of every drive with its miles and a category, ready to export at tax time. Available with Pro.
- 1
Set where your day starts
Tap the gear icon, then Primary address under Mileage. Search for your home or office, or tap Use My Location. Each logged day's first drive starts here.
Without a Primary address, the first drive starts from where you are, if Show My Location is on. Otherwise the log starts at your first stop.
- 2
Log the day
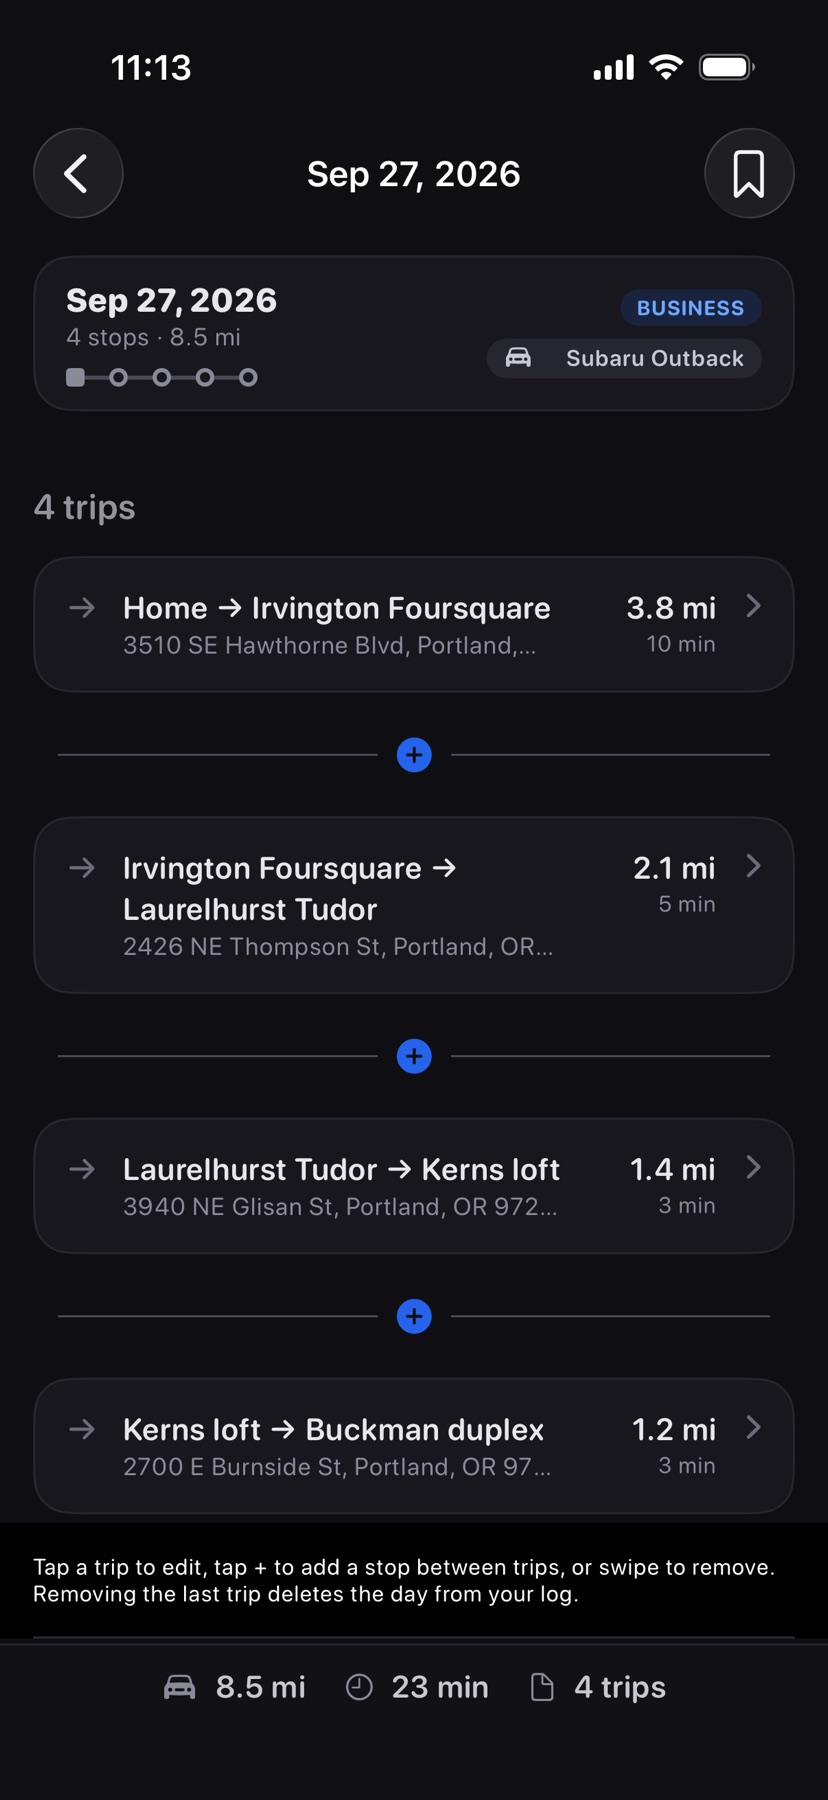
At the bottom of the list, the daily summary shows your stops, miles, and drive time. Tap Log Trip. It turns to Logged.
Auto-log trips is on by default, so a day logs itself some time after your last stop ends. If iOS holds off, it logs the next time you open HopStop. Turn it off in Settings → Mileage if you'd rather choose the days.
- 3
Add your own categories
Every day logs as Business to start. Business and Personal come built in. For anything else, open Settings → Mileage → Trip Categories, type a name, and tap Add.
- 4
Set each day's category
Open Settings → Mileage → Mileage Log, tap a day's category and pick another. To change several days at once, tap Select, tick them, and tap Set Category.
To record which car you drove, add it in Settings → Mileage → Vehicles, then pick it on the day's card.
Export for your records
In Mileage Log, tap Export. Choose the dates and a category, check the count, then tap Export to save or send the CSV file.
Miles are estimates from map routing.
Shown in HopStop 1.0.69 or later.